 Linux Delhi India Linux Users Group – Delhi

Installing Lubuntu

Boot from your live CD or USB drive and choose your native language. (Unless of course you feel you need an extra challenge).

You can either choose the “Try Lubuntu without installing option” or the “Install Lubuntu” option. I always boot into the live mode and run the installer from there.

When the live version of Lubuntu loads double click on the Install Lubuntu 14.04 icon.
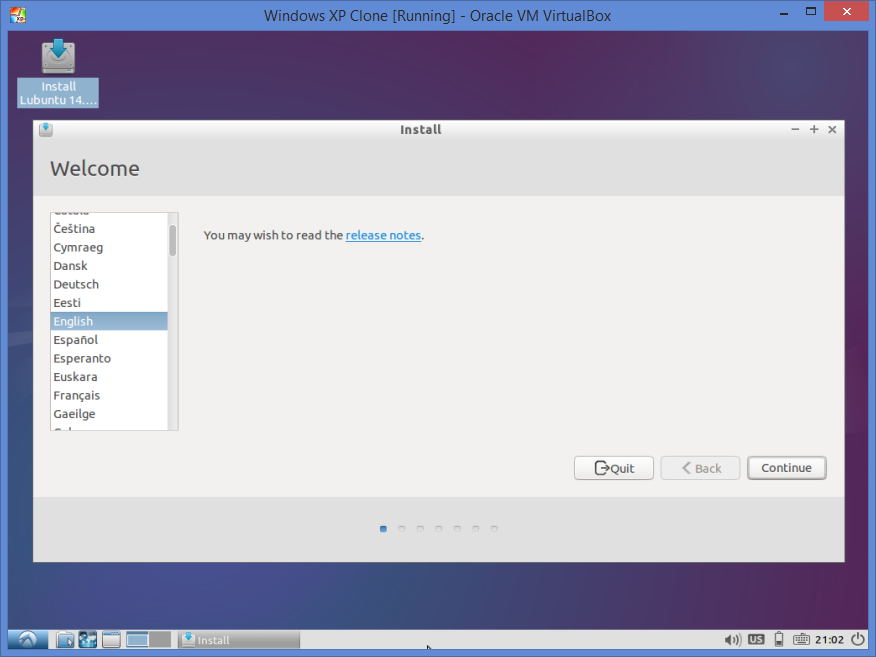
The first thing you will need to do is choose your language. (Again, unless you feel like an extra challenge it is probably best to choose the language you are most comfortable with).
Click “Continue”.
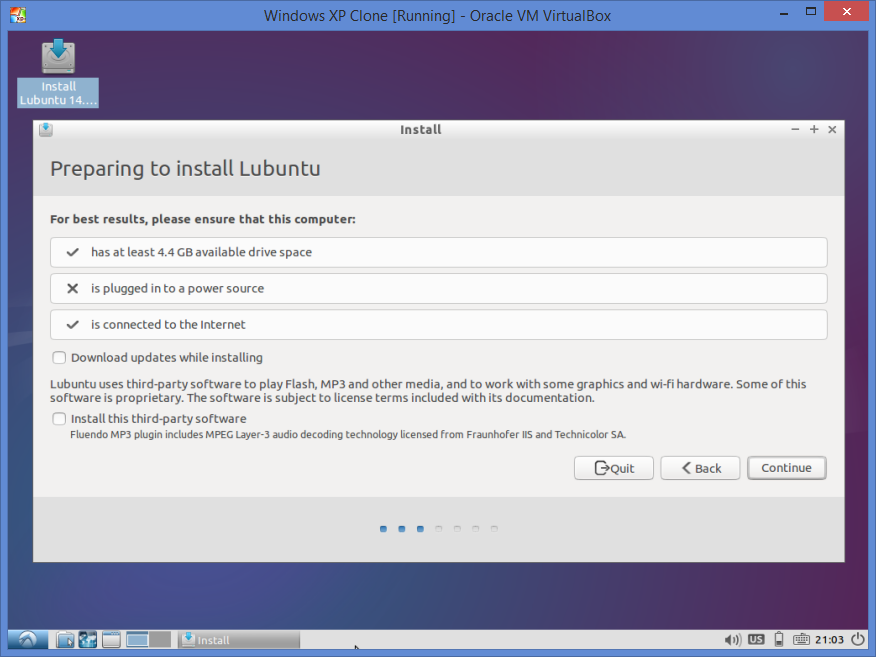
The next screen checks that you are ready to install Lubuntu.
The three ticks make sure that you:
- have at least 4.4 gigabytes of disk space (Unless your computer is from 1992 I would expect it to)
- is plugged into a power source (you will see that mine wasn’t when I ran the installer)
- is connected to the internet (this is actually optional and not required).
Being connected to the internet lets you download updates as you install. I actually prefer to install the updates after the installation and this is a good choice if you have a poor internet connection.
The other option lets you choose to install the third party software which allows you to play Flash, MP3 files and other media. Again I always choose not to check this option and I run a post installation task that does the same thing.
Press “Continue”.

Now you have a choice to make. You can install Lubuntu alongside Windows XP or you can replace it with Lubuntu. The something else option lets you partition your drive manually and set the partitions yourself and is for more advanced users.
Quite often the dual boot option is useful for running essential Windows software that you can’t run in Linux, such as iTunes. The alternatives include running Windows in a virtual machine.
If you have an older machine then dual booting is probably the best option if you desperately need to keep any Windows software because it only takes up disk space. Using a virtual machine isn’t a good idea as the host operating system will use resources and the virtual machine will take up resources.
If you have no Windows software that you are attached to then go for the replace option. If your main use of Windows software is Internet Explorer and Outlook then you can get away with replacing Windows with Lubuntu as there are better alternatives available.
Choose either to replace or install alongside and click “Continue”.

The next step is to choose your timezone. Simply click where you live on the map and click “Continue”.

Now choose your keyboard layout and click “Continue”.
Almost there now.
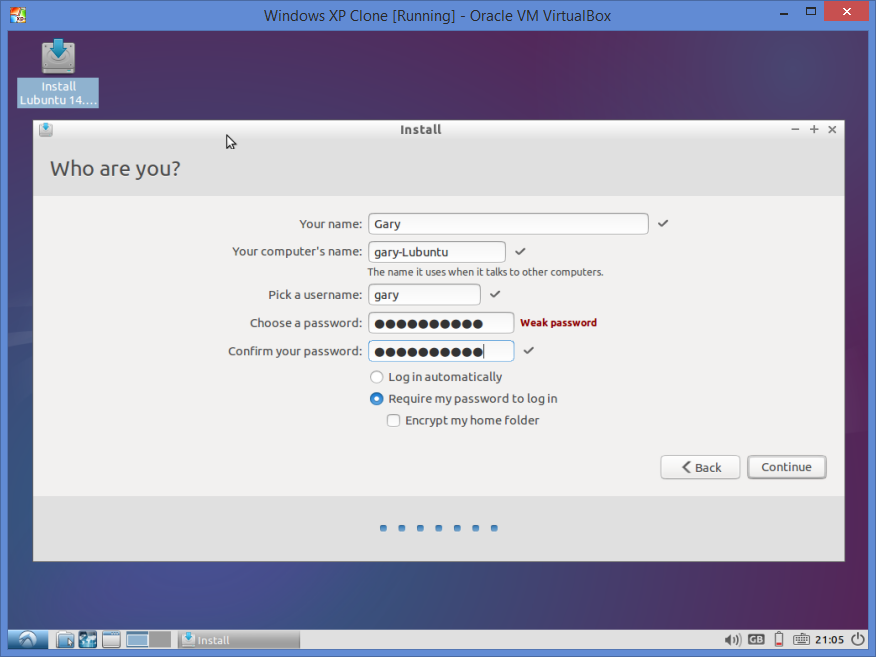
Create a default user by entering your name, a name for the computer, a username and a better password than the one I obviously chose judging by the screenshot above.
If you are the only user of this computer then you can get the computer to automatically log in. I don’t really like this option because if somebody else uses your laptop then they are automatically using your user account.
Click “Continue”.
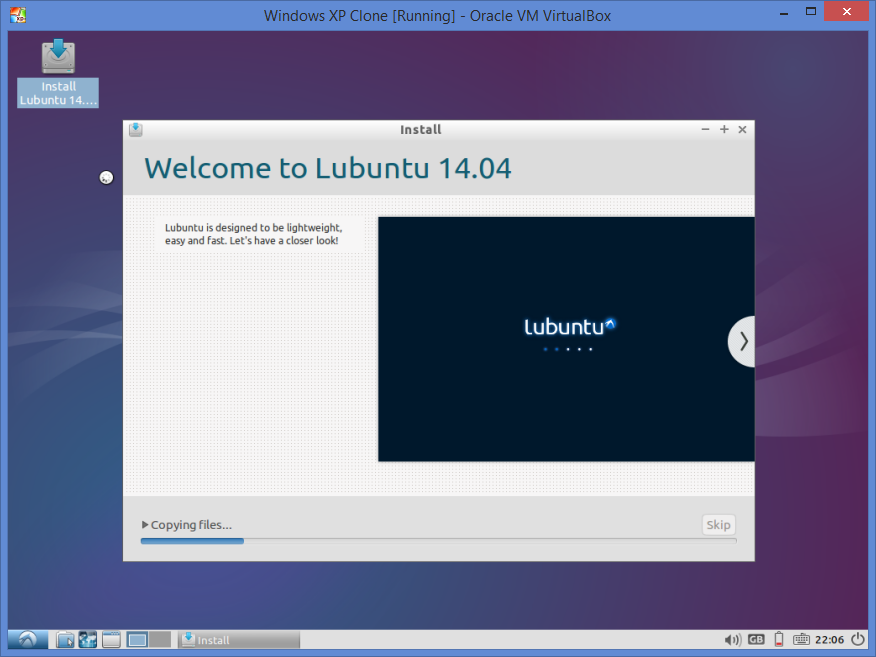
The files will now be copied to your computer.

That is all work. You now just need to restart your computer.
If you chose to install alongside Windows then you will now have a boot menu whereby you can choose to use Windows or Lubuntu otherwise you will be able to boot into Lubuntu only. Welcome to the world of Linux.